

Key Takeaways
Why Thermostat Wiring Varies — and Why It Matters
Programmable thermostat replacement is one of the more accessible home upgrade projects, but the wiring behind your wall plate is not universal. Homes built or retrofitted at different times use different wire configurations, and HVAC system types — forced air, heat pump, boiler — each have their own terminal requirements. Getting the wiring wrong doesn't just mean the thermostat won't work; it can damage your HVAC system's control board.
Before purchasing a new thermostat, identify exactly what wires you have. The most common sticking point is the C-wire (common wire), which provides continuous 24V power. Many newer programmable and smart thermostats require it, but homes built before the 1990s often lack one at the thermostat location. This isn't always a dealbreaker — some thermostats include adapter kits — but it's something to verify before you open any boxes.
Label Your Wires Before Removing Anything
Use small pieces of masking tape and a marker to label each wire with its terminal letter before you disconnect it. Even with a clear photo, labeled wires make reconnection far faster and reduce the chance of error. Terminal labels like R, G, Y, W, and C are standard but wire colors don't always match those letters in older homes.
If your home is older and you're planning multiple smart upgrades, it's worth reviewing what older home wiring means for smart devices before committing to any specific product.
Tools and Preparation
Gathering the right tools before you start keeps the job moving and reduces the risk of mistakes. You don't need specialized electrical equipment — but a voltage tester is non-negotiable for confirming power is off before you handle any wiring.
Flathead and Phillips screwdrivers
Used to remove the old thermostat faceplate and secure wires to terminal screws on the new unit.
Voltage tester or multimeter
Confirms power is off at the thermostat wiring before you handle any connections.
Masking tape and marker
Used to label each wire before disconnecting it from the old thermostat.
Smartphone camera
Photographs the existing wiring layout as a backup reference during reinstallation.
Wire stripper
Removes insulation from wire ends if they are too short or corroded for a clean connection.
C-wire adapter kit
Provides a common wire connection for thermostats that require it, in homes without an existing C-wire.
Also review the prerequisites below before starting. Understanding your system type and having the new thermostat's wiring diagram in hand makes every subsequent step more straightforward.
What you will need
Step-by-Step Installation
Follow these steps in order. Skipping ahead — particularly past the power shutoff and wiring documentation steps — is where most installation errors happen.
Turn Off Power at the Breaker
Go to your electrical panel and switch off the breaker labeled for your heating or cooling system. Use a non-contact voltage tester at the thermostat wires to confirm no current is present before you touch anything. Do not skip this step.
Remove the Old Thermostat and Document the Wiring
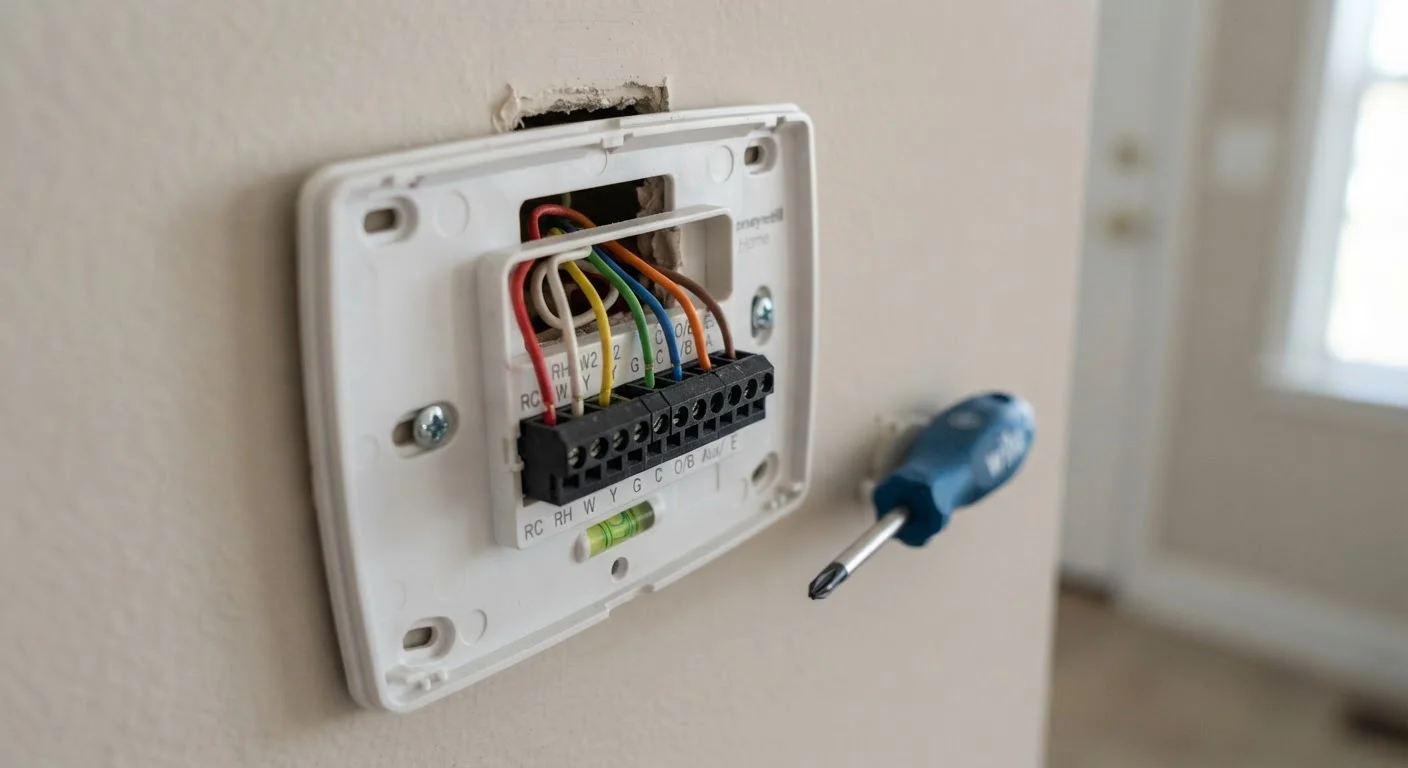
Remove the thermostat faceplate — most snap off or are held by one or two screws. Before touching any wires, photograph the terminal block clearly, showing each wire color and the letter of the terminal it's connected to. Then apply labeled tape to each wire and disconnect them one at a time.
Identify Your Wires and Check for a C-Wire
Look at the terminal labels on your old thermostat. Common terminals include R (power), G (fan), Y (cooling), W (heat), and C (common). The C-wire is the one many programmable and smart thermostats need for continuous power. If you don't have a wire connected to the C terminal, check your thermostat's documentation — you may need an adapter or a technician to run a new wire.
For more on how older home wiring can affect smart device compatibility, see what wiring limitations mean for smart home plans.
Mount the New Thermostat Base and Connect the Wires
Attach the new thermostat's wall plate using a level to ensure it sits straight. Then connect each labeled wire to its corresponding terminal on the new unit, following the new thermostat's wiring diagram precisely. Wire colors in older homes are not always standard, so match by terminal letter — not by color.
Wiring errors are among the most common causes of thermostat and HVAC problems. Our related guide on common wiring mistakes that lead to smart device failures covers errors worth avoiding.
Restore Power and Test the System
Snap the thermostat faceplate onto the base and restore power at the breaker. Follow the thermostat's setup prompts to configure your system type, then test each mode — heating, cooling, and fan — individually to confirm the HVAC responds correctly. Listen for the system to start within 5 minutes of a call for heat or cool.
Program Your Schedule
Once operation is confirmed, set up your temperature schedule. Most programmable thermostats allow weekday and weekend schedules with multiple time periods per day. A common approach is to set back the temperature by 7–10°F during hours you're away or asleep — a range that energy efficiency guidance generally identifies as meaningful without sacrificing comfort.
If you're moving to a smart thermostat, see setting up a smart thermostat without an electrician for additional programming and app-setup guidance.
Always Cut Power at the Breaker First
Low-voltage thermostat wiring can still carry enough current to damage your new thermostat or your HVAC control board if shorted. Before removing your old thermostat, locate the breaker that controls your heating and cooling system and switch it off. Confirm power is off before proceeding — do not rely solely on the thermostat's own display going dark.
If at any point the wiring looks more complex than expected, stop and consult a licensed HVAC technician. Correct installation is worth the cost of a service call compared to an HVAC control board replacement.
When to Call a Professional
Most single-stage forced-air systems with standard wiring are genuinely DIY-friendly. However, certain situations call for a licensed HVAC technician:
- Heat pump systems — These use additional terminals (like O/B for reversing valve) that vary by manufacturer and can cause operational problems if misconfigured.
- Line-voltage thermostats — Electric baseboard heaters and some radiant systems use 120V or 240V thermostats. These are not low-voltage and require an electrician, not a DIY swap.
- No C-wire and no adapter solution — If your system's wiring doesn't support an adapter and you need a C-wire run, that's a technician job.
- Unfamiliar or unlabeled wiring — If the wires in your wall don't match any standard configuration, don't guess.
For a deeper look at how wiring missteps cause device failures, see setting up a smart thermostat without an HVAC background.