

Key Takeaways
What Your Camera App Is Hiding From You
Most people tap the shutter button and trust their phone to handle the rest. That approach works fine in bright daylight — but it leaves a surprising amount of capability untouched. Modern smartphone cameras ship with settings borrowed from professional photography, tucked behind menus that the average user never opens.
This isn't about turning photography into a technical hobby. It's about spending two minutes in your settings to get noticeably better results in the moments that matter — a birthday party, a landscape on vacation, a meal worth remembering. The settings below are available on most Android and iOS devices, though exact names and locations may vary slightly by model and software version.
Your phone is capable of much more than you've seen from it. So is its camera. For a broader look at hidden smartphone capabilities, see everything your smartphone can do that you probably haven't tried.
Exposure Compensation (the brightness slider)
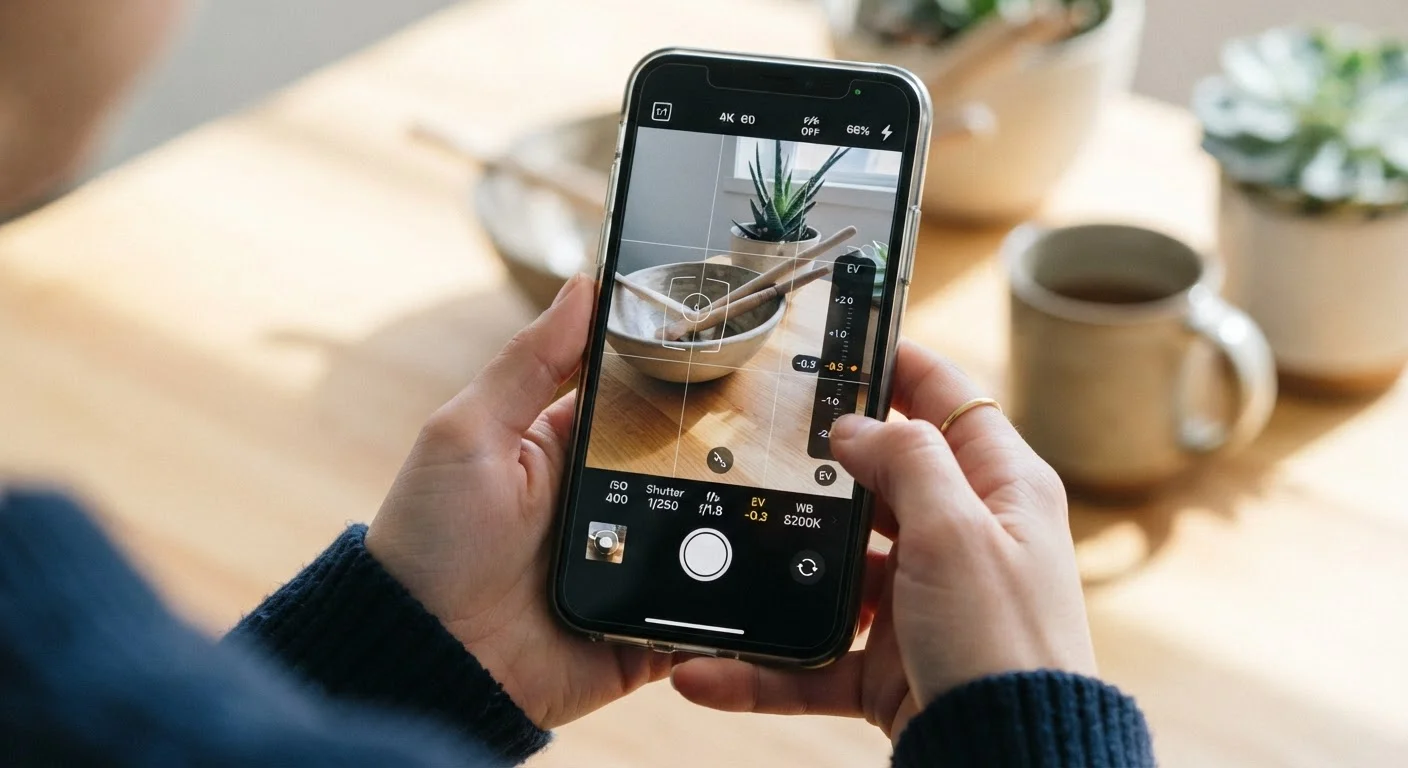
When you tap a subject on your screen, your phone sets the exposure automatically — but it doesn't always get it right. Tap and hold on your subject, then look for a sun icon with a slider. Drag it up to brighten the image, or down to darken it.
This is especially useful when your subject is backlit (standing in front of a bright window, for example) or when a scene is mostly very dark or very bright. Auto mode tends to average everything out, which can wash out highlights or crush shadows. A manual nudge takes less than a second and makes a real difference.
A quick drag on the exposure slider rescues backlit portraits that auto mode washes out.
Grid Lines for Composition
Grid lines divide your viewfinder into nine equal sections using two horizontal and two vertical lines. Enabling them costs nothing and helps you apply one of photography's most reliable composition principles: the rule of thirds. Placing your subject at one of the four intersection points — rather than dead center — tends to produce more visually interesting images.
Grid lines also make it much easier to keep horizons level, which is one of the most common and fixable problems in casual photography. Look for this option under Camera settings on both iOS and Android devices.
Grid lines make it easy to level horizons and frame subjects more naturally in every shot.
RAW or High-Efficiency File Format
By default, your phone saves photos as compressed JPEGs. That's convenient for storage, but compression discards image data permanently. If you ever edit photos — even just adjusting brightness or color in your phone's own editor — starting from a richer file produces better results.
Many Android phones offer a RAW or RAW+JPEG option in Pro or Expert mode. iPhones running iOS 14.3 and later support Apple ProRAW on compatible models. RAW files are larger and require compatible editing apps, but they preserve far more tonal detail. If RAW isn't available or practical, check whether your phone offers a higher-quality JPEG or HEIF setting as a middle ground.
RAW files preserve detail that compressed JPEGs discard — making edits look cleaner and more natural.
Manual ISO for Low-Light Shots
ISO controls how sensitive your camera sensor is to light. A higher ISO brightens a dark scene but introduces grain (called noise). Auto mode often pushes ISO too high in dim conditions, resulting in muddy, grainy images. In a Pro or Manual shooting mode, you can set ISO yourself.
In a dimly lit restaurant, try a moderate ISO — something in the 400–800 range — before reaching for the highest available setting. Combine this with a slightly slower shutter speed if your subject isn't moving, and you'll often get a cleaner image than auto mode delivers. Experiment to find what your specific phone handles well before noise becomes distracting.
Setting ISO manually in dim light gives you cleaner images than letting auto mode guess.
Aspect Ratio (wider than you think)
Most phones default to a 4:3 aspect ratio, which matches a traditional photo frame. But your screen — and most modern displays — are closer to 16:9. Shooting in 16:9 fills the screen better for sharing, but crops more of the scene vertically. Some phones also offer 1:1 (square, useful for certain social media formats) or full-sensor modes that capture everything the lens sees.
There's no universally correct choice — it depends on how you plan to use the photo. What matters is making that choice intentionally rather than accepting whatever the default happens to be. If you print photos or plan to crop significantly, wider capture gives you more to work with.
Choosing your aspect ratio deliberately — not by default — gives you more control over how images are used.
Timer and Burst Mode
The self-timer isn't just for selfies. Setting a two- or ten-second delay eliminates camera shake caused by pressing the shutter button — useful for tripod shots, macro photography, or any scene where stability matters. It's one of the simplest ways to get sharper images without any additional gear.
Burst mode, on the other hand, fires a rapid sequence of photos while you hold the shutter. This is invaluable for moving subjects: kids, pets, sports, candid moments. Rather than hoping one shot lands perfectly, you pick the best frame from dozens. On iPhone, hold the shutter button. On many Android devices, there's a dedicated burst option or a similar hold-to-shoot behavior.
Burst mode turns unpredictable moving moments into a sequence you can pick the best frame from.
Small Changes, Noticeably Better Photos
None of these settings require technical expertise — just a willingness to explore the app you already have. Start with one or two that match the situations where your photos most often disappoint you. Low-light shots blurry? Try manual ISO. Horizons always crooked? Turn on the grid. Cropping too much in editing? Switch to RAW or a wider aspect ratio.
Explore Pro Mode Without Fear
If your camera app has a Pro, Expert, or Manual mode, try it in a low-stakes situation first — photographing something stationary at home. You won't break anything, and getting familiar with ISO, shutter speed, and white balance controls in a relaxed setting means you'll know how to use them when it counts. Most phones let you switch back to Auto instantly if a shot isn't working.
Your camera app is only one part of what your phone can do. If you're spending extra time in apps because your battery won't cooperate, it's worth checking out why your phone battery is dying faster than it should — some fixes are simpler than expected.