

Key Takeaways
Why Small Kitchens Feel More Crowded Than They Are
Most small kitchens aren't actually short on space — they're short on organized space. Flat cabinet shelves that sit half-empty above a single layer of cans, countertops occupied by rarely used appliances, and cabinet doors that contribute nothing are the real culprits behind the feeling of overflow.
The good news: you almost certainly have usable storage you haven't tapped yet. Vertical wall space, the backs of cabinet and pantry doors, the area above the refrigerator, and the insides of deep drawers all hold potential. This guide walks you through a systematic process for unlocking it — no renovation required.
Before diving into products or systems, it helps to understand what kind of kitchen you're working with. If you're starting from scratch or resetting entirely, the comprehensive kitchen organization guide covers the broader framework of zones, countertop management, and daily habits that make storage solutions stick.
What You'll Need Before You Start
Gathering the right materials before you begin saves multiple trips and keeps momentum going. You don't need to buy everything at once — assess your space in Step 1 first, then acquire only what your specific kitchen calls for.
What you will need
Stackable shelf risers
Create a second usable layer inside cabinets, doubling vertical storage for cans, jars, and boxes.
Over-the-door organizers
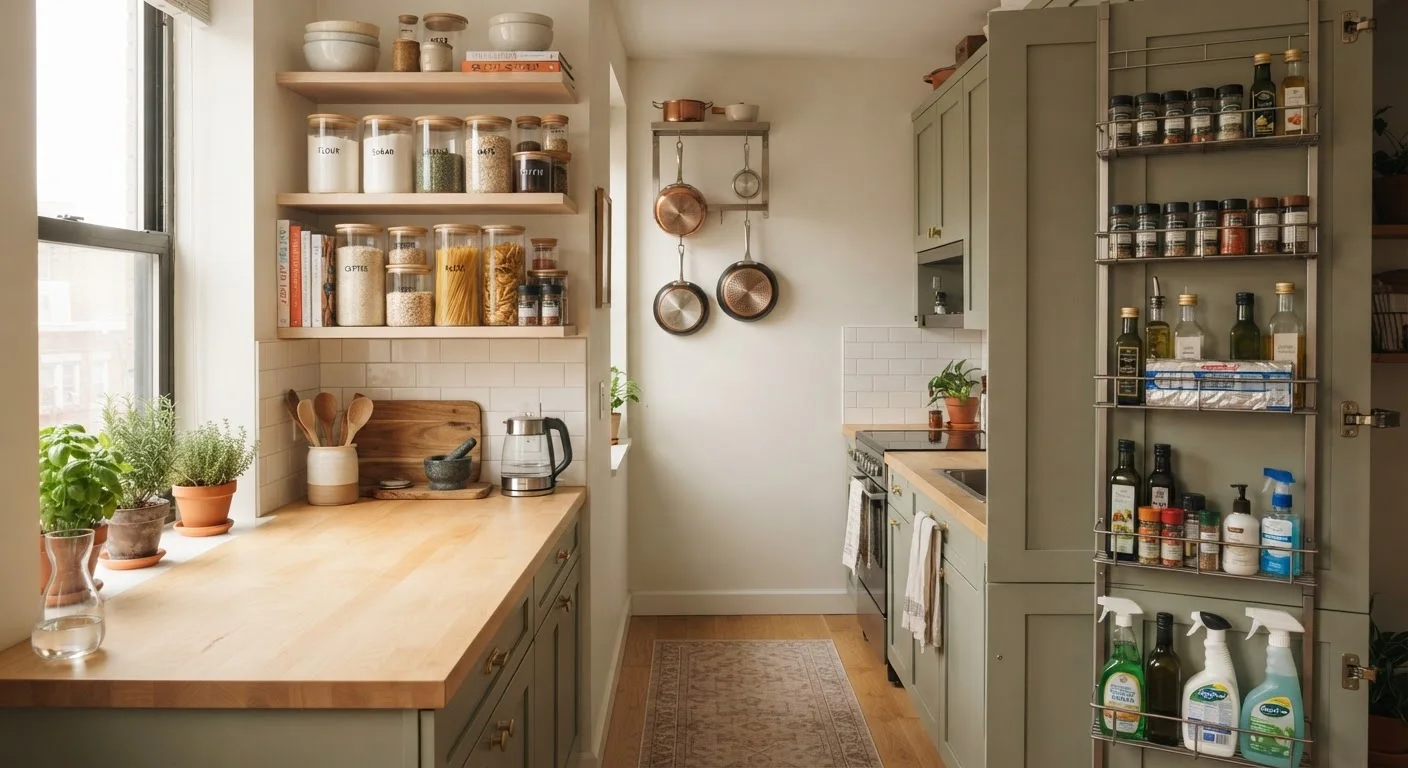
Mount on the inside of cabinet or pantry doors to store spices, wraps, foil, or cleaning supplies.
Lazy Susan turntable
Makes deep or corner cabinet contents fully accessible without unloading the entire shelf.
Pull-out drawer organizers or bins
Convert deep, hard-to-see shelves into manageable zones where nothing gets buried.
Wall-mounted magnetic strip or rail system
Moves knives, utensils, or spice jars off the counter and onto unused wall space.
Clear, uniform-sized containers
Standardize pantry staple storage so shelves stack efficiently and contents are visible at a glance.
Step-by-Step: Building a Smarter Storage System
Follow these steps in order. Skipping the declutter phase and jumping straight to organizers is the most common mistake — it leads to elaborate systems built around things you don't use.
Empty and audit every cabinet and shelf
Take everything out — one cabinet at a time if needed. Group items on the counter or table by category: grains, canned goods, baking supplies, snacks, spices, and so on. As you go, set aside anything expired, duplicated, or genuinely unused. Be honest: an item you haven't touched in six months is occupying space a useful item could have.
This step also gives you an accurate picture of what you actually own before you buy a single organizer. Running a quick kitchen organization audit at this stage helps you spot gaps and redundancies you'd otherwise miss.
Measure your shelves, doors, and wall clearances
Before buying any organizers, measure shelf height (top of shelf to underside of shelf above), door width and depth clearance (how far a door organizer can project without blocking closing), and available wall spans. Write these down. A riser or door rack that doesn't fit your exact dimensions wastes money and a trip to return it.
Claim the vertical space inside cabinets
Most cabinet shelves sit far apart — often 12 or more inches — but cans, spice jars, and small boxes are only 4–5 inches tall. That gap above them is wasted. Stackable shelf risers insert into that dead zone and create a second usable tier. Use the lower level for taller items (pasta boxes, cereal) and the upper riser shelf for shorter ones (cans, jars).
For a deeper look at how different pantry systems compare — including risers, containers, and FIFO rotation — the pantry organization methods comparison lays out the real trade-offs of each approach.
Put cabinet and pantry doors to work
The back of a cabinet door is flat, accessible real estate that most kitchens ignore. Door-mounted organizers — available in wire, plastic, and over-door pocket styles — can hold spice jars, aluminum foil and plastic wrap boxes, cleaning supplies, or small cutting boards. Assign each door a specific category so it's immediately clear what lives there.
Tackle problem zones: deep shelves, corners, and countertops
Deep shelves bury things. A pull-out bin or a lazy Susan turntable makes the back of a deep cabinet usable without archaeological digging. Corner cabinets respond well to the same turntable approach. On countertops, apply one rule: only items used at least three times a week earn permanent counter space. Everything else moves to a cabinet. For more on that decision, the countertop appliance evaluation framework offers a clear process.
Use wall space for frequently grabbed items
Walls between and above cabinets are often blank. A mounted rail or magnetic strip can hold knives, cooking utensils, or small jars — moving them off the counter and out of crowded drawers. Floating shelves above a window or doorframe work well for infrequently used items like serving platters or large stock pots. When mounting anything to walls, use anchors rated for the weight you're placing on them and locate studs where possible.
Maintaining What You've Built
A reorganized kitchen reverts to chaos within weeks if there's no maintenance habit behind it. The simplest approach: a brief monthly reset where you pull everything forward, check expiration dates, and return misplaced items. This pairs naturally with a weekly shopping habit — before you buy more, audit what you already have so you're not doubling up on pantry staples you've simply lost track of.
For spices specifically — one of the fastest categories to get out of hand in a small kitchen — it's worth choosing a storage method intentionally. The right spice storage approach depends on your cabinet layout and how often you cook, and getting it right frees up significant shelf space.
Finally, if you're weighing whether to go fully open with wall shelves, read up on the real trade-offs of open kitchen shelving before committing. What looks spacious in photos can feel cluttered and dusty in a working kitchen.